Replacing an Under Decklid Panel on a 1940 Ford Coupe
Battered, Bruised, and Broken
By Ryan Manson * clampdowncomp@gmail.com
One of the most common troublesome areas on a 1935-40 Ford coupe has got to be the panel under the decklid. Whether damaged from collision, rot, or rust, this panel seems to bear the brunt of abuse. Most of this is thanks to the panel’s design. Essentially forming the outside edge of the lower trunk pocket, also referred to as the tool box, this area acted as a catch basin for water and debris, a perfect petri dish for rust and rot. Another factor that contributes to the extent of damage often found on these Post War Fords is the bumper bracket location that passes through the panel. Any rear collision effectively pushed these brackets and/or the bumper towards the body, contacting and likely damaging, the under decklid panel in the process. Using a bumper jack to change a flat tire was commonplace at the time and an inattentive user might result in a situation where the bumper brackets were pushed into the panel, again damaging the surrounding sheetmetal. Multiply a handful of any of those events by a lifetime eclipsing eighty years and it’s a small wonder these cars are even still in existence.
When we originally purchased our ‘40 Ford coupe, it was obvious by the images posted in the ad that the car was sorely in need of repair in this often-damaged area. When combined with the repairs that would be required to the floor and lower trunk area, we figured it’d just be another sheetmetal job to be added to an already long list.
Thankfully, all these sheetmetal panels are available new from United Pacific. Having already repaired the main floor pan and trunk floor using their new stampings, the next logical repair to be made was the under decklid panel. While replacing this panel is pretty cut and dry when it comes to your typical patch panel job, there are a few things to look out for as the original, damaged sheetmetal is removed and the new panel welded in place. For starters, the decklid opening and relationship between it and the deklid itself needs to be carefully monitored. Once the lower panel is removed, the quarter panels might have tendency to spring apart, impacting this dimension. By placing the decklid in the opening and adusting the panels to suit, the panel’s gaps can be fixed to an acceptable spec and the under decklid panel’s installation can be continued efficiently. The lower edge and underside of the under decklid panel affixes to the trunk floor and can effectively be pushed in or pulled out a significant amount before being welded in place. Care must be taken to maintain a consistent line along the bottom of the panel so as to transition into the fenders in a smooth manner.
Once the fitment of the panels is acceptable, they’ll be plug welded together, mimicking Ford’s original manufacturing techniques. This requires quite a few holes to be punched or drilled into the overlapping panel, but makes for an extremely strong joint and isn’t as easily warped as one with a continuous weld.
When it came to repairing the rear section of our Ford, what seemed like a rather large task ended up being a fairly quick repair once the panels were all lined up and the welding began. With the new United Pacific panel effectively repairing the entire rear section of the coupe in one fell swoop, we’re making quick work out of the repairs necessary on our rust bucket early Ford. CC
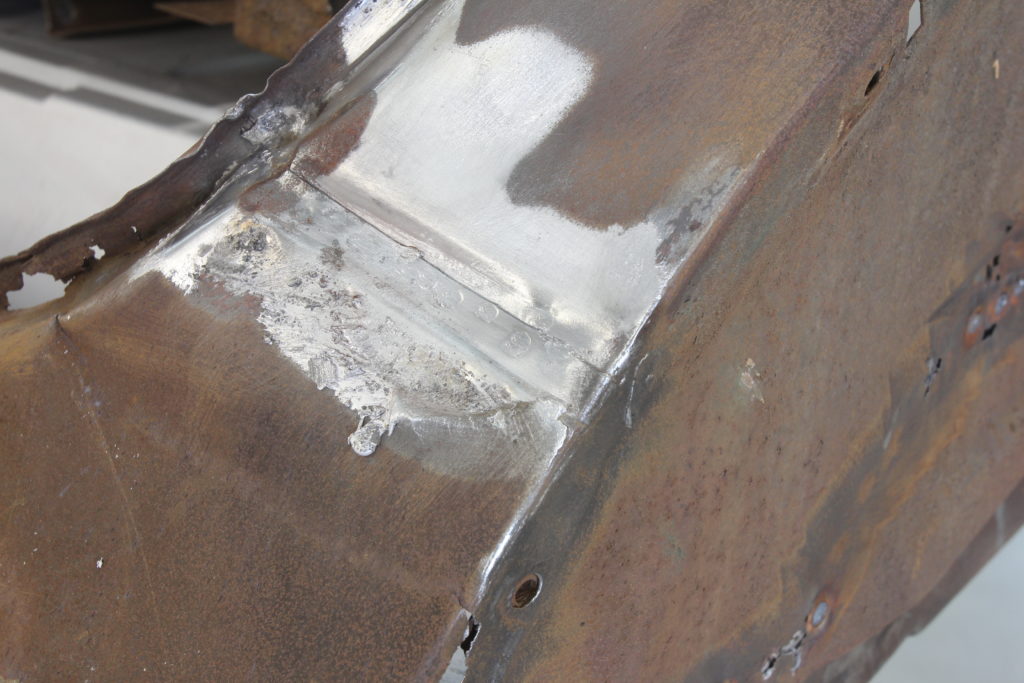
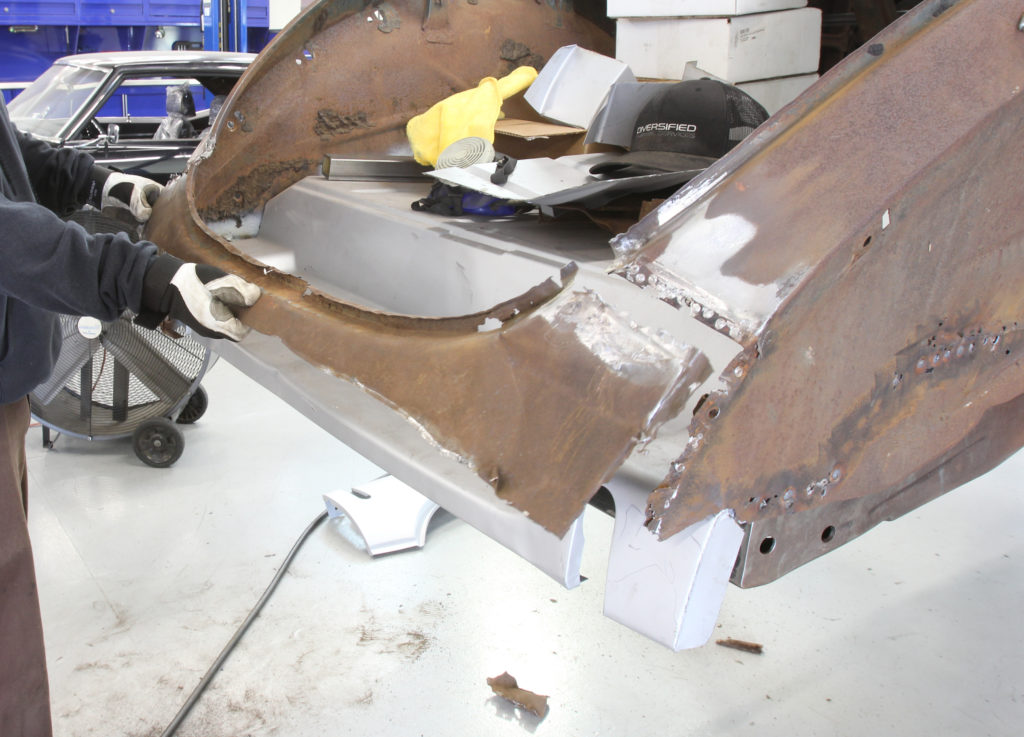
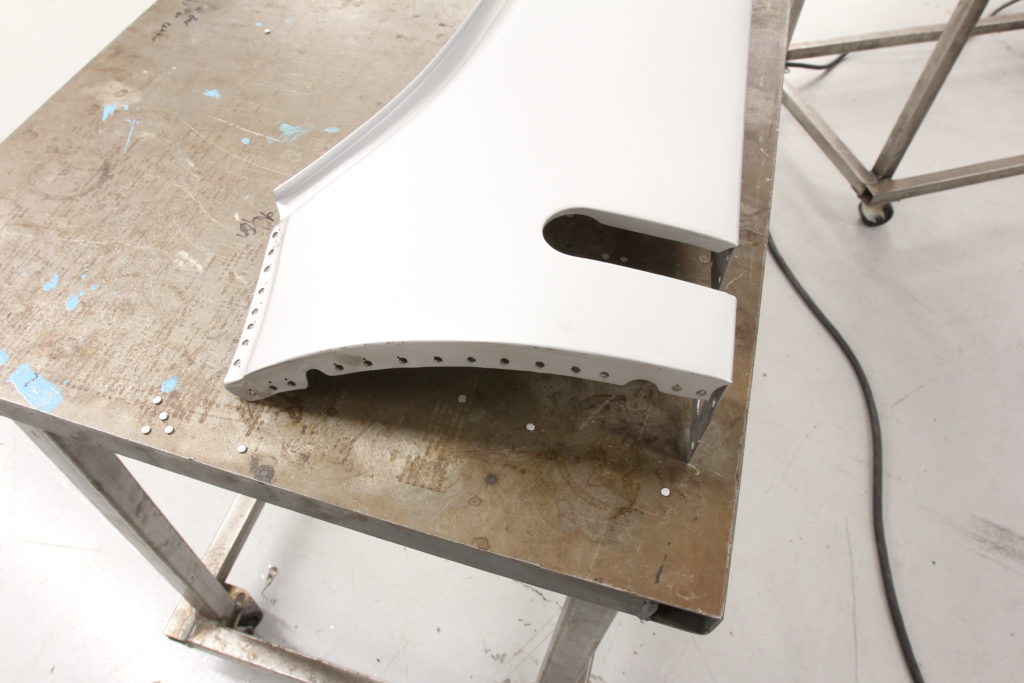
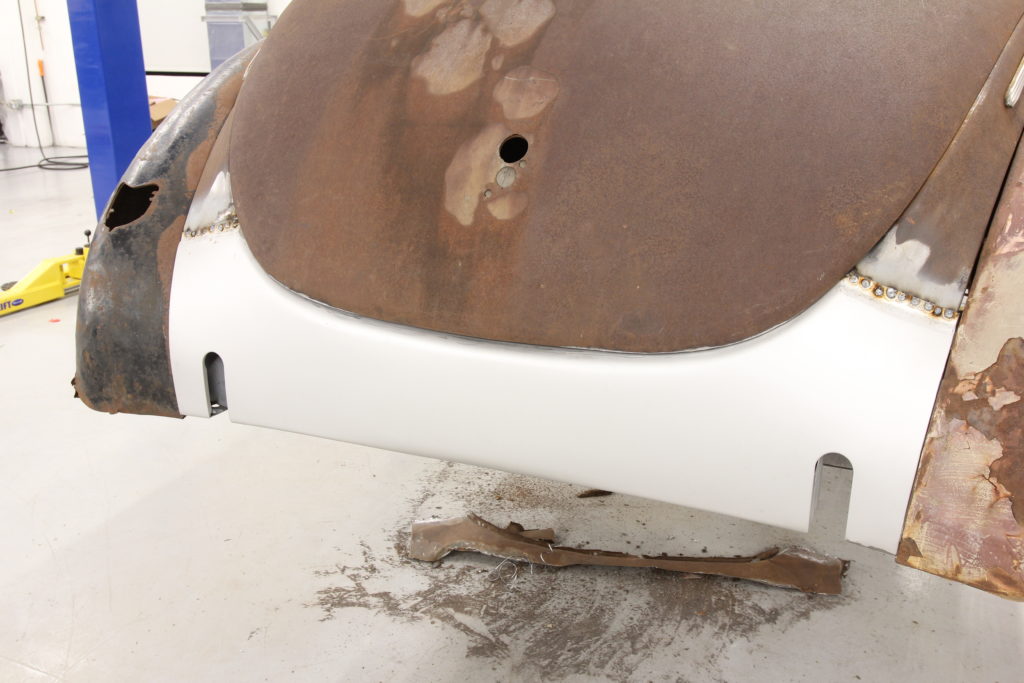
The first step in repairing the damaged panel is to burn out the lead that was used in the factory to fill the joint where the under decklid panel and the quarter panels meet. A little heat is all that’s required so a MAP gas torch works perfect. Once the lead is molten, it will literally start to run down the seam and onto the garage floor, so be sure to put something down that is inflammable to catch the slag before you get started. A stainless steel wire brush works great to help coerce the lead out of the seam while the heat is being applied.With the majority of the lead removed, we can now view the spot welds that were made in the Ford factory. These need to be drilled out in order to remove the damage lower decklid panel without distrubing the surrounding sheetmetal. Here, the spot welds have been drilled out using a spot weld cutter and the lower decklid panel is beginning to break free.In addition to the spot welds, a portion of the pinch weld of the decklid opening where the two panels meet has been welded together. This seam is carefully cut using a pneumatic cut off wheel. Now, the under decklid panel can be removed in its entirety.We replaced the trunk floor previous to this job and from this angle, you can see the pockets formed that led to the previous rust and rot. This area is generally referred to as the “tool box”, probably due to the fact that it’s where any tools ended up if placed in the trunk! Before the new under decklid panel can be installed, there are two pocket covers that are part of the under decklid panel kit and need to be installed at either side of the tool box.Before the pocket covers are installed, we wanted to check the fitment of the under decklid panel by clamping it in place. The dimensions are spot on, so it’s onwards and upwards.We’ll be plug welding the two pocket covers in place like the rest of the sheetmetal compoments, so a dozen or so holes were punched around the edges before they’re installed using a pneumatic punch. A couple Cleco fasteners hold the pocket covers in place while the holes are welded up. Before we install the new under decklid panel, the fitment of the actual decklid is checked and massaged. A pair of stirring sticks are used to hold the proper gap at the top while a ratchet strap tie-down is used to align the quarter panels. Another handful of holes are punched in the new under decklid panel so it can be plug welded to the body and trunk floor. Then, it’s a simple matter of lining everything up and using a couple sheetmetal screw to hold the panel in place while things are triple checked. Once satisfied with the fitment of the panel, a pair of plug welds are made at either side to hold things in place for the time being.The lower edge of the under decklid panel folds under the trunk floor and will be plug welded to it. However, the panel can be pushed in and pulled out in relation to the trunk floor, radically changing the rear panel’s shape as well as the lower body line. In order to maintain consistency from one side to the next, a radius gauge is used to check the curvature of the panel around the area of the bumper bracket cutout and where the panel meets the fender. Here, the curvature of the panel is evident as are the dozens of plug welds made to attach the under decklid panel to the trunk floor. With our fenders in the shape that they are, it’s hard to tell if the panel was spot on or not, hence the use of the radius gauge and a handful of careful measurements. The last piece of the puzzle is to install the trunk floor toolbox braces. These three items are available seperately and provide support to the under decklid panel as well as providing a mounting point for the decklid latch. Like all of the sheetmetal components from United Pacific, these are coated in weldable primer so they can be installed as-is and, once welded in place, won’t rust while the project continues. Note that we haven’t welded in the center latch brace yet. Here’s the new under decklid panel welded up and ready to rock. Compared with the first image, it’s amazing how much a single panel can do to repair an ailing body!
Related posts:
Roadster Rhinoplasty, Part II Roadster Rhinoplasty, Part II The track nose for the Project Potvin roadster is starting to take shape By Ryan Manson * clampdowncomp@gmail.com Our last story laid the foundation for the front end of the Project Potvin Roadster in the form of building a buck in which to shape the track...
Roadster Rhinoplasty, Part III Roadster Rhinoplasty, Part III Wrapping up the track nose for the Project Potvin roadster By Ryan Manson * clampdowncomp@gmail.com One of the most exciting aspects of any project is when it really begins to take shape and form and begin to actually look like something. For the past year or...
Dashing Debonair Installing a 1952 Pontiac dash in a 1952 Ford F1 pickup truck Dashing Debonair By Ryan Manson * clampdowncomp@gmail.com It’s not uncommon in our hobby to see a car that has been customized to such an extent that it makes it quite hard for not only the newcomer but even...
1940 Ford Floor Repair Floored! A Rusty Shell of a ’40 Ford Gets Some Much Needed Sheetmetal Repair By Ryan Manson * clampdowncomp@gmail.com Let’s face it, we’ve come to the time in hot rodding’s long history where it’s very rare to find an unmolested early Ford body that doesn’t need a ton of sheetmetal...
Installing an Overdrive T5 Transmission in a Model A Ford Installing an Overdrive T5 Transmission in a Model A Ford Five Forward Gears for a Model A By Ryan Manson * clampdowncomp@gmail.com A Model A Ford can be one of the simplest machines in which to work. That’s a good thing becuase if you own one, chances are there’s something...